I am working on a new series of artwork, Snapshots and Memories from Languedoc-Rousillion. This series of small artworks is inspired by my recent trip to France. You can read about the first two prototype ATCs I created in this earlier blog post.
This last prototype is inspired by skeleton keys.
This piece started out with a different key in the center of the ATC. I chose a print I made during Dayle’s workshop. However, when I added the oil paint to color the encaustic wax, the original image was essentially lost under the paint. The print wasn’t bold enough to compete with the additional color.
So I tried another idea. I sketched over the print of another key with a 1.0 micron pen and applied that image over the original skeleton key.
Skeleton Key ATC
This improved version features encaustic wax colored with phthalo blue oil paint, verdigris and tapestry embossing powders, incising, a polymer clay keyhole, and polymer clay embellishments.
Now I’m ready to dive into the heart of this new series of artwork.
Snapshots and Memories from Languedoc-Rousillion
This new series of artwork will be made available first to those who receive my monthly e-newsletter. The ATCs will be presented in single, double, and triple format, mounted on wood and ready to hang.
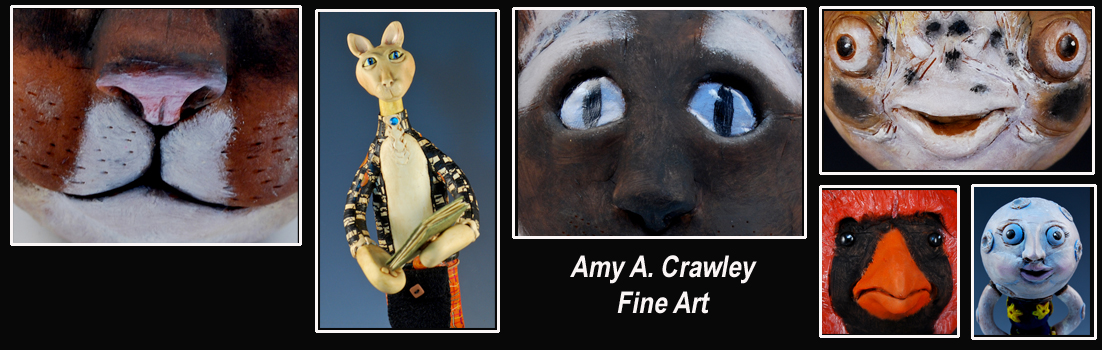
If you are interested in learning more about this series, please subscribe to my newsletter via this form my website Amy A. Crawley Fine Art
After I return from France, I am embarking on a new art project: Snapshots and Memories from Langeudoc – Rousillon. This art project will focus on the creation of artist trading cards (ATCs) using encaustic medium and polymer clay. The theme for this art project is capturing the essence of the Langeudoc – Rousillon region in France.
ATCs are the size of trading cards and can be created from just about any medium, including felt, polymer clay, paper, fiber, or some combination of mixed mediums. You can read about the history of ATCs here.
This past week I delved into this project by creating two prototype ATCs. This was my time to practice my approach to creating the ATCs, practicing with the encaustic medium, and generating ideas of what types of images I’ll be looking for in France.
Below are pictures of the prototypes.
Le Tournesol "Sunflower" ATC
Le Tournesol ATC Detail
Le Tournesol was created on Ampersand ATC Encaustic board. Materials: Napkin, encaustic medium, polymer clay, oil paint, alcohol inks, mica powder, metal stamp letters.
Le Chat Noir ATC
Le Chat Noir ATC Detail
Le Chat Noir was created on Ampersand ATC Encaustic board. Materials: French dictionary page, found images, encaustic medium, polymer clay, alcohol inks, oil paint, metallic rub-on, texture plate.
The ATCs will be mounted on wood in single, double, and triple layout.
About a week ago I wrote a post about an evolving idea where I shared how I went from one conceptual idea that failed, to another idea which really sent the creative muse into overdrive.
With a new vision in mind, I proceeded to take one of the new polymer clay focal disks I created and combined it with a beeswax design applied to an artist board.
Here is the artist board with colored beeswax before attaching the polymer clay focal disk:
"Within 1" artist board
I applied several layers of beeswax to the board, incised the circles and lines, and then colored the surface with alcohol inks.
Then I added a polymer clay focal disk:
"Within 1"
I’m really happy with the way this first piece turned out.
Abstract art is a completely new area for me to explore. It isn’t something I’m typically drawn to. But like I said, I really like this new combination of polymer clay and beeswax and I really like making these focal disks. Trying something completely new and different also falls in line with choosing the word BIG as my word of the year.
The beeswax/encaustic medium has really caught my interest. Last week I spent some time experimenting with beeswax, alcohol inks, gold leaf, and pearl ex powders. I don’t normally dive into a new medium without understanding it a little more. In other words, I’m not always one to experiment with a medium I know very little about. Diving right in seems to fit living my word of the year: BIG.
All of these experiments were done in my mixed media sketch book. I’ve since learned that paper is not the best substrate for beeswax beyond the experimentation stage.
Experiment #1
Everything but the kitchen sink....
Experiment #1 has everything in it: beeswax, gold leaf, alcohol inks, pearl ex powders and swirls created by impressing the wax with an unmounted stamp.
Experiment #2
Feels like autumn....
Experiment #2 includes beeswax, alcohol inks, gold leaf and a texture sheet impressed into the wax. At this point I continue to have problems with the texturing. The wax is peeling off the paper and sticking to the texture sheet (or unmounted stamp as in experiment #1.) In experiment #2 I also tried incising or cutting into the wax with a needle tool. I like the way it directs the alcohol inks.
Experiment #3
Did Monet start out this way?
In experiment #3, I decided to keep it simple and applied three colors of pearl ex powder to the wax surface. I like the way the wax moved and blended the powders. The overall effect is very soft and dreamy.
Experiment #4
Mysterious words
In experiment #4 I started by stamping with black ink onto the sketchbook paper. Then I applied a layer of beeswax, followed by pearl ex powders and another layer of beeswax. Using a fine tip exacto knife, I “wrote” in the beeswax and back filled the marks with alcohol ink.
Experiment #5
The kitchen sink over wood
In this final experiment, I lightly sanded a small piece of wood and applied beeswax, gold leaf, alcohol inks, pearl ex powders, and texture. The wood is definitely a better substrate for the beeswax. I still had a minor problem with the texture plate pulling some wax off the surface. I think this may happen because the wax was still too warm or the layers were not fused well enough. Given that I’m using some very basic tools that don’t have exact temperature controls on them, I guess I shouldn’t be too surprised.
I want to create mixed media wall art pieces as part of the Glimmer Series. As I started to develop this body of work, I had a strong urge to work with beeswax. Don’t ask me why; I have no idea. But the muse said to give it a go and to see what happens.
Ideally I would love to create the mixed media wall pieces on artist panels. I bought a few 4″x4″ panels with a 3/4″ profile last December. Those panels are intended for a different project but they might be incorporated into this body of work.
Anyways, before jumping right in and working on the panels, I created a prototype wall piece on 5″x7″ artist canvas panel. This gave me the chance to play with beeswax, papers, oil paint and polymer clay all on one surface. Beyond that, I didn’t plan out the piece with a sketch and just worked intuitively.
Glimmer of Hope Wall Prototype
I started out by applying beeswax to the canvas, placed a page torn from an old book into the wet wax, and then fused more wax on top. From there I built layers with rice paper, paper beads, and oil paint. I fused tiny pieces of branch around two words from the book: “Changed” and “Beautiful”. The polymer clay face is taken from a mold made of Glimmer #1’s face and painted gold.
When the entire piece was cooled and dry, I highlighted the raised areas with Gilder’s Paste. Gold stamped words “Glimmer” and “Hope” finish this prototype.
In January, I received a request for artwork from Patti Digh. Patti, who is the author of Life is a Verb, sent an email to many artists around the world asking who would be interested in submitting artwork for her upcoming book, Four Word Self Help.
Patti described Four Word Self Help as follows:
I wrote this compilation of four-word self-help wisdom in reaction to all the very complex self-help books I’ve seen—isn’t there a simplicity to life that we can tap into, things we already know? For example, “Eat less, move more” or “Do work that matters” or “Leave some things undone.”
The book would be in small format, 4.5″ x 6.25″. Participating artists would receive a phrase to illustrate. All artwork had to fit into the small format and could not contain any words, text, or language.
I was intrigued and replied that I was interested in participating.
A couple weeks later, I received a second email with a phrase that I was to interpret and illustrate. I had two weeks to create my artwork and submit it for possible inclusion in the book. We were also told that if our artwork was accepted, the editors may use it for a different entry than originally submitted.
The phrase I received was “Do What You Can.” The phrase made me chuckle. Given the slightly abstract nature of the phrase, I could only do what I could in my interpretation of it.
Creating artwork in a limited time frame is both demanding and energizing. You have to focus on the task at hand immediately, go with your gut, and hope it all works out to your satisfaction.
In early February, I submitted my artwork. On April 15, I received word that my artwork had been accepted into the book!
And on Tuesday, 8/17, my complimentary copy of Four Word Self Help arrived at my home.
It is such a thrill to see my artwork in print and in such a wonderfully inspiring book. I am honored to have my artwork in this book among the illustrations and interpretations of nearly 100 artists.
Here is the artwork I submitted:
"Do What You Can"
And how my artwork appears in Four Word Self Help:
On Page 129
Four Word Self Help is due in stores in September. Be sure to look for it! You can also pre-order a signed copy of the book from Patti. Click here.
Four Word Self Help Cover
Thanks to Patti Digh for this most excellent experience.
Continuing my periodic posts on my progress in the Right Brain Business Plan e-course, the next topic is determining your target market and finances.
Up to this point, we’ve discussed values and our business vision, the business self-portrait and the business landscape. However, now that you’ve got this great product or business idea, you have to think about who you’re selling to; your target market.
Target Markets
Unless your product or service is geared to a specific customer base, determining your target market requires a bit of educated guessing. Historically, I’ve known that women are my primary market. But which demographic of women?
Some areas to consider when determining your target market include the potential customer’s age, education, financial background, career, and location (urban/suburban/rural.) Those are the fairly straight-forward, easy to answer questions.
Then there are the demographics that might not be as easy to answer, such as shopping preferences, forms of entertainment, and likes and dislikes. We refer to those as the “I’m making up these answers” type of demographic questions.
As I started to write down the details about my ideal customer, I realized the description seemed to fit me. I guess it is good to know I might actually buy my own artwork. However, it is also important to stretch beyond the familiar.
To that end, I came up with two groups women for my target market:
The mid 20’s to 40 year old group
Customer Collage 20's-40 y.o group
I’ve defined the 20-40 year old market as those entering their professional or career world, D.I.Y, Etsy or handmade nation supporters/creatives; supporters of the green movement, including recycling/up-cycling. They shop online and are technology savvy. They have an interest in art/craft and learning something new and would like to earn some money using their craft skills.
These women are making a name for themselves and are entrepreneurial. They enjoy social networking, social media and have an interest in self-care and holistic areas. They are primarily college educated. May be dealing with debt issues, especially student loans. This may effect what they buy and spend money on.
The 40’s to 70’s group
Customer Collage 40's-70's group
This target group is comprised, primarily, of college educated, professional women who are questioning the “next step” in their lives. They want to express themselves creatively but may not know how to access and express their creative muse. Therefore they are seeking guidance on creativity; how to be creative, how to make art/craft.
Within this group are those who will be or are empty-nesters, including active retirees. All of these women want balance and fulfillment and seek how to make meaning in their lives. For the most part, these women are comfortable in their own skin.
I put the two collages shown above in my Vision Book in an envelope titled “Target Market.” On the back of each collage I wrote down some of the demographics as listed above.
Playing With Numbers
After we determined our target market, it was time to look at the finances. (Or, as Jen puts it “Making the Moola.” Doesn’t that sound more fun?) Not always a pleasant task and probably the one area that many creatives hate to deal with. We like to bring in the money; it is the money going out that pains us.
Way back, I used to keep track of my finances with an Excel spreadsheet. As my business grew, I switched to Quickbooks. QB is great because you can generate a variety of reports, depending on your needs. This year I was better about setting a budget for those costs which are fairly static and for some expenses I knew were coming up this year.
However, setting financial goals and writing them down has never been my strong suit. We all have our issues with money; voices and impressions from childhood that stick with us. Another reason this has been difficult is the feeling (an excuse???) that I can’t make someone buy my artwork. So how could I possibly set a revenue goal?
However, with encouragement through the RBBP process, I set a financial goal for the year. Then I looked at all the areas where the business generates revenue, including 3 new areas that I’m pursuing this year, and determined the percentage of income each area needs to produce. In July, I will review these goals, see how I’m doing and determine the appropriate follow-up action.
How about you? Who is your target market? Have you set any financial goals for the year? How do the money ‘voices’ impact your progress?
The Right Brain Business Plan (RBBP) e-course is rolling into its 6th week. That puts us 3/4 of the way through the class. Hard to believe it has gone by so quickly…and that I haven’t been very good about keeping you up-to-date on my progress.
Last I wrote about the RBBP, I shared my business vision and the Vision Accordion Book that I created. Since then, we’ve tackled our business self-portrait, our target market, working the numbers, and determining sources of support.
The Business Self-Portrait
Developing our business self-portrait and business landscape was fun and challenging at the same time. This is where we determine where our business fits in the larger business landscape. We approached this from two directions, those things under our control (our strengths, challenges, and opportunities) and those things NOT under our control such as customers, trends, competition and barriers.
The self-portrait provided another opportunity to creatively paint a picture of my strengths, challenges, and opportunities. It was also a bit intimidating because we are asking questions about ourselves. While this is a hard task for anyone, I think it may be a bigger challenge for women because most of us are told not to talk about the things that we’re good at, not to talk about our successes and achievements. That is the sign of a bragger, an arrogant person, and an egotistical person.
Well, fat on that.
One way we were given to approach this task was to ask friends, family, associates, co-workers, and colleagues a series of questions such as “What three words would you use to describe me?” “What would you say are my natural gifts, strengths, and passions?” and “What would you say sets me apart from the crowd?”
It was humbling and heartwarming to receive people’s answers to those questions. Holding a mirror up to yourself is not easy. Asking people their opinion isn’t always easy either. However, the way you are seen in another person’s eyes can be very affirming.
Following another RBBP classmate’s lead, I entered the words and phrases into Wordle to create a word cloud. Then, inspired by those black construction paper silhouettes we had as kids, I asked Eric to trace my head onto a large sheet of paper. This profile would become the centerpiece of my business self-portrait.
Business Self-Portrait
The self-portrait features the word collage in the center of my silhouette. Other components include my background and experience, skills and talents, customer quotes, opportunities and challenges.
Biz Self-Portrait Top Half
Biz Self-Portrait Bottom Half
The Wordle collage puts in bold typeface those words that appear most often. From this one might summarize that the words most often used to describe me are: knowledgeable, caring, creative, understanding, organizer, listener, thorough, and courage. These words give me insight into my strengths and skills and themes that could influence my business.
The Business Landscape
The business landscape is an on-going process. Creating the landscape requires a bit more detective work. It is here that you look at trends (social and economic), think about how big your market is, map out your target market, consider direct and indirect competition, take into consideration what you do well and barriers that you might encounter.
The fun apart this assignment is we can create SWAGs (Silly Wild Ass Guesses) for those areas where we don’t have a definite answer right now. It is better to put down a SWAG than to get stuck and not move forward. And through research an answer, hopefully, will be found.
To help with this part of the process, I set up a fabric covered tri-fold foam core display board that I used long ago in my first art shows. At the top of the middle section, I’ve posted the name for this entire venture “The Creative Well.” This section is also for tracking trends and market information, including a map of Massachusetts and New England, information on population, numbers of polymer clay teachers in the area, and my business self-portrait.
The left panel is for information on the competition and potential collaborators. The right panel holds information on resources, such as places where I might be able to teach polymer clay classes. As I come across and collect information, it is added to the designated section with push pins or notes written on Post-it notes.
Biz Landscape Detective Board
I like this format because it is portable and collapsible. I keep the board on a shelf right across from my work table so I see it every day. When I add information or want to analyze the entire picture, I can lay it on the floor to get a good overview.
Our first major assignment in the Right Brain Business Plan course was to create a vision board. We were tasked with cutting out images that represented the overview of our company, our business values, the products and services we offer, our target market, our creative cohorts and supporters, our financial dream, and anything else we wanted to add.
The fun part, aside from following our intuition and cutting apart magazines, was creating our vision board in any format we desired. It could be a large poster, a book, a cube, a deck of cards. Anything.
I decided to make what I call a Vision Accordion Book.
The Book’s Exterior
To make a Vision Accordion Book, you need an old hardbound book that you’ll tear apart. A year ago, in preparing for my trip to France, the thought of tearing the covers off an old book sent chills up my spine. It seemed sacrilegious to deface an old book. This year, however, I had absolutely no qualms about ripping apart an old book.
I searched my studio and found a book that I used in a collage class several years ago. Nothing of value inside this book.
Future Vision Book
Using a sharp box cutter, I sliced along the front and back spine of the book until it was loose enough and I could pull off the covers.
These will become the Vision Accordion Book covers. At this point these covers are now called book board.
You can cover the book board with fabric or paper. I choose a fabric that I bought in Revel, France because it was during my time in France when I realized that I wanted to teach art workshops. Workshops and retreats are the focus of my business plan.
French Fabric for Vision Book
I cut the fabric about 1″ larger than the book board. Glue the fabric onto the front of each book board, flip the book board over, and carefully fold and glue the edges of the fabric, one edge at a time, onto the insides of the book board. After the book board is covered and the glue is dry, glue a contrasting sheet of paper (solid color, decorative, your choice) on the inside of each book board.
Note: The paper on the inside of the book board is going to be covered by the accordion fold pages of your book. So don’t agonize over using fancy paper or paper with text because you won’t see a lot of it once you glue in your accordion fold pages.
Covered Book Boards
I decided to use large sheets of watercolor paper for the book’s pages. I can’t tell you the weight of the paper because I bought it years ago (when I took that collage course I mentioned earlier.) I wanted my pages to be 5″ wide by 8″ long. I measured the paper accordingly and cut the paper. And when I tell you there is no such thing as a straight line, believe me. Even with a ruler and a pencil line on the paper my cutting is a little wobbly.
I cut two strips of paper and glued them together to form a really long piece. Then I started accordion folding. I measured and scored the paper with a bone folder every 5″ and then folded the paper. I flipped the paper over for every other fold to ensure the pages would accordion correctly. (There are simpler ways to make an accordion fold. But because I needed a specific width for each page this was the approach I used.)
Images
Since this is a Vision Accordion Book, I needed lots of images to glue onto the inside pages. This is a fun task and almost always results in an overabundance of images. I spent a few hours on different days going through Martha Stewart Living, Yoga Journal, Shambala, Women’s Day, and MORE magazines.
The tendency, when choosing images for your vision board or book, is to tear out pictures of things you like, things you want to have, places you’d like to visit, etc. Often we do this without any conscious thought about our intention for the vision board. And this means we may miss the very image that we’re really looking for. Martha Beck recently wrote an article on vision boards that you might enjoy. Check it out here.
Here are all the images I cut out and spread out onto a table in my studio.
Looks a bit overwhelming doesn’t it?
From here I sorted the pictures into various categories: Company overview and values, products and services, wealth and abundance, target market and creative cohorts and supporters. And then I sorted the piles again, removing images that didn’t quite resonate with me and the intention of this book.
Vision in Action
Once I sorted the images and felt good with my choices, I started to lay them out on each page, one at a time. I spent over 3 hours trimming, laying out and gluing down the images. Then I glued the first and last page to the front and back book boards.
And viola! My Vision Accordion Book was complete.
Vision Accordion Book
The first two pages explain the overview of my business.
Company Overview
Pages 3 & 4 show my business values and the products and services I’ll offer.
Business Values, Products & Services
Pages 4 & 5 explain more about my business and my vision for wealth and abundance.
Wealth and Abundance
Page 4 above also has a picture that I glued to the top of the page. Siddharta sits in the “No Fear” muhdra. The image folds over the page when the book is closed. The page 4 picture comes from a Soul Card I made a while back. It signified how I felt at the time “facing the unknown” and how many of us feel during a time of change and transition. When I found the picture of Siddharta in the “No Fear” muhdra, it only seemed appropriate to add him to this picture. I’m moving ahead without fear.
No Fear
Finally, pages 6 & 7 represent my creative cohorts and supporters and my target market. Here is a shout-out to those people who are supporting me in this adventure, who offer words of advice and suggestions. As the small print under your pictures states “I can succeed by getting support.”
Creative Cohorts & Target Market
There you have it. My Vision Accordion Book. At some later point during this class, I’ll add some envelopes to the back sides of these pages for notes and goals. I’d also like to go back and soften the edges of the pictures with oil pastels. For now, however, it feels complete.
My goal with CED is to dedicate part of one day each week to an art activity inspired by the monthly theme. If I’m able to fit in other non-art related activities inspired by the monthly theme, even better!
Monday: Started the week off nicely with a treat for the body-a hot stone massage.
Tuesday: Keeping the body healthy with the annual mammogram
Wednesday: Exercised the body with a half day of skiing.
Thursday: A mind-mapping teleseminar with Julie Stuart; good for the brain and the business
Friday: Friday is the day I try to dedicate to an art specific project using the CED theme for inspiration. During the week I finished sculpting a head following the Creager’s head sculpting DVD. Heads always look a little scary before going in the oven and before the eyes are added.
Front of Head
This head also shows my first attempt at sculpting ears.
Left Side (My What Big Ears You Have)
Right Side (Do these ears make me look fat?)
And I completed this little guy, “Man in Turban.” This piece will be sent to the sons of a gallery owner. The boys helped in the construction of the head.
On this particular Friday I pulled out Cate Coulacos Prato’s book Mixed Media Self-Portraitsand worked on a warm-up exercise called “Color Your World.” Through this exercise you create a self-portrait using one color. The portrait can be literal or abstract or expressive.
Prior to creating my self-portrait, I meditated for a few minutes to get clear on which color was “me” this morning. I repeated the names of several colors over and over and the one that came to me most prominently was orange.
Orange? (Prior to the exercise I was focused on the color blue; my inner voice obviously thought otherwise.)
Okay; I spent 15-20 minutes gathering materials including colored pencils, markers, oil pastels, paints, construction paper, and tore orange colored images from several magazines. Then I got to work. I started by scribbling in a background and then glued the large image with the words “Find Your Center” on the middle of the paper. The woman meditating was glued on top of this background.
From here I worked intuitively, not really stopping to think about my choices. I just cut, scribbled, tore, and glued paper. Sometimes I would flip the image upside-down to see blank spaces that needed filling. During all the activity I remembered my paper punches and used them on the magazine images as well to make leaves and starbursts.
Here is how the piece turned out:
Color Your World-Single Color Self-Portrait
Find Your Center-Top Half
Find Your Center-Middle Section
Find Your Center-Bottom Half
Impressions
The piece seems to have no rhyme or reason. I started with the woman mediating because I like to meditate though I don’t do it as often as I used to. Ironically she was wearing an orange top! I also liked the words on the background image (Find Your Center) because I’m always working on learning more about my intuitive, spiritual side.
One thing I learned while working on this piece is that some personal symbols are emerging for me. Between this piece and last week’s creation, I find myself incorporating circles, dots, rough edges (torn paper), curly-q’s, and swirls, lines ending in points, stars or starbursts, little falling images (here falling leaves & starbursts; last week was falling stick figures.)
As I finished this piece I applied a wash of orange watercolor and thinned orange acrylic paint. As the piece dried, I spontaneously added a small strip of orange construction paper over the woman’s eyes. For some reason I didn’t want to focus on her eyes. I added a couple more strips of construction paper on the upper left corner and the right side of the piece. And then I glued the words “Guide Us” over the woman’s paper covered eyes. This represents my intuitive side, the part of me I’m trying to open up and learn about. Finally I addded the words “Success” and “In every possible situation” to complete the piece.
So I guess what this piece tells me is that I’m trying to find my center to guide me to success in every possible situation.
Meanings for Orange
Orange is a blend of red and yellow. It symbolizes stimulation, success and attraction. Orange is associated with orange fruit which symbolizes fruitfulness and fecundity (capable of producing offspring or vegetation; fruitful; marked by intellectual productivity.) Orange is the color of the sacral chakra which is associated with nurturing, receptivity, and emotions.
Orange is often used to depict the sun. It symbolizes happiness, socializing, abundance in career, projects, and matters needing an added push.


")


