Musings from the Moonroom

Thoughts on Art, Inspiration, Creativity and Spirit


4 Comments

Grabbing the Brass Ring

During the winter, my local art guild had a creativity challenge for members. We’ve had these “exercises” before and it’s always fun to see what people create when challenged to think out of the box, out of their comfort zone, and/or out of their usual medium.

In this particular challenge we were asked to create something inspired by, or with, a found object. But not just any ol’ found object.  Nope. This time members brought a found object from their home, placed in a paper bag, to our monthly meeting. All the bags were put in the middle of the table. Then we took turns, kind of, choosing a bag from the pile. No peeking. Off each of us went with our little found object of inspiration. The deadline for revealing our found object creation would be the next month’s meeting.

What was my found object? Two brass rings about 1″ in diameter. They look like rings you might find on an apron or a belt. My first reaction? What the heck am I going to do with these?

My Creative Process

I looked at those rings and my brain came back instantly with a big blank. Kind of like a sheet of white paper or an empty canvas. Absolutely NOTHING. I put the brass rings on one of my work tables and let them sit there for a few days.

Finally, feeling a bit like Pooh Bear when he starts to think, I decided to use a word association game to stimulate some creative ideas.

poohbear_think-1

I looked at the brass rings, held them in my hand, and started writing in my sketch book. I wrote down anything that came to mind when I looked at the rings. Things like “One ring to rule the world” and “Circle of Life” and “Two rings for marriage.” Even completely unrelated phrases such as “Cool runnings” and “Square peg in a round hole” were fair game.

Then I let the list sit for a few more days. Because no ideas were coming to me. Yet. I believe you can’t force the process.

Breakthrough

This challenge came during the time I was taking Flora’s class. That meant I had several canvases strewn about the studio in different phases of creation.  A few of them were used to collect excess paint. If I had extra paint on my brushes or on my main palette at the end of a painting session, I would swipe the brushes clean on a blank canvas. This is when my breakthrough happened.

I remembered Flora telling us that one way to create an intuitive painting is to work with shapes. Repeating shapes. Abstract shapes. It didn’t have to be complicated. KISS, I say. Keep it simple, stoopid.

I picked up one of the excess paint canvases and a Sharpie marker. I started to write all the phrases from my sketch book, the ones from my word association game, onto the canvas. I started writing on the long side of the canvas, turned it 90 degrees, and continued writing on the short side. Turned it 90 degrees again and kept writing on the long side. As I wrote, even more words came to mind. I did this until all the phrases were written on the canvas in a continuous square-circle shape. It ended when I was almost near the center of the canvas.

Somewhere along the way I had an idea to paint the brass rings white and where I would put them on the canvas. I would use the circle shape as my inspiration.

Result

I don’t have a lot of process pictures. You know how it is when you get into the flow and just keep working. Who has time to think about stopping and taking pictures along the way?

This is the canvas at a very early stage when it was used to collect excess paint.
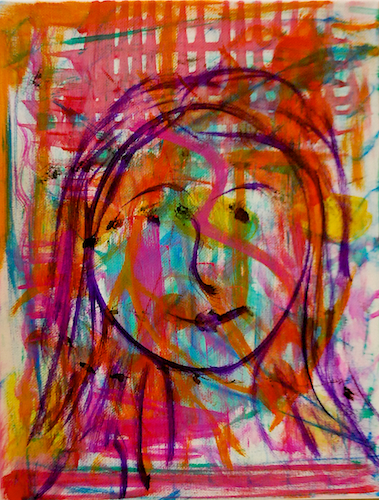
BeforeBrassRingBy the time I started writing words all over it, several more layers had been applied to the canvas. The face disappeared quickly.

The picture below is one of the few in-process pictures I found. The brass rings that started this whole piece are in the lower right corner. I attached them to the canvas with heavy gel medium.

Brass Rings In Process

Brass Rings In Process

The remaining pictures show the finished canvas.

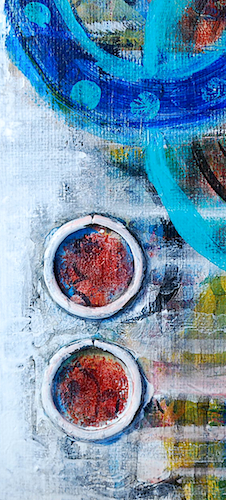
Brass Ring Detail

Brass Rings Detail

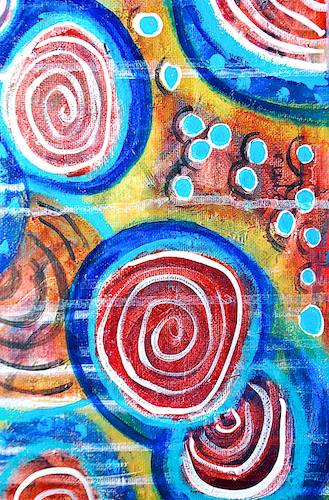
Brass Rings Circle Detail

Brass Rings Circle Detail

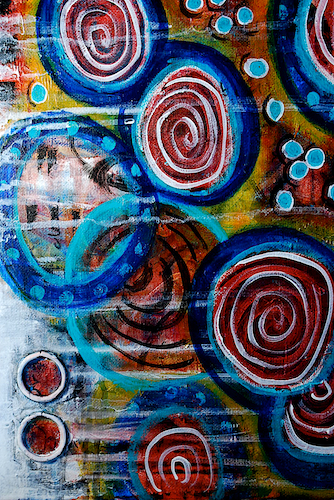
Brass Rings Full Length Detail

Brass Rings Full Length Detail

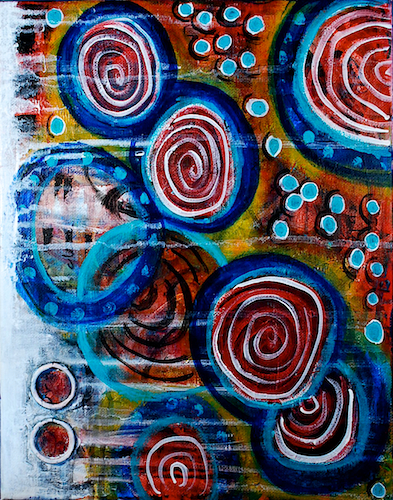
"Brass Rings"  Amy A. Crawley, 2014

“Brass Rings”
11″x14″
Acrylic, Sharpie marker, found objects
Amy A. Crawley, 2014

Most of the words I wrote on the canvas were covered by paint. Though if you look at it real close, you may see a few words or letters peeking through the paint.

This piece taught me how to work with a limited color palette, repetition of shapes, and creating movement in the piece so your eye travels around the canvas.

Thanks for stopping by.


2 Comments

Entering The Awkward Teenager Stage

Oh goodness, I can’t believe it has been several weeks since I posted about my class with Flora Bowley. The month of March has passed so quickly. I haven’t forgotten about you. I’ve just been focused in another direction.

In my time away from the blog, I’ve received my level 2 Reiki certification, had a revelation about the direction I want to take in life, finished Flora’s class, and started researching my family tree in preparation for an upcoming trip. All good stuff.

I’ve continued to work on my paintings from the workshop. They’ve gone through several more iterations since I last posted. I refer to this as the awkward teenager stage. I like how they look. I don’t like how they look. They want more of a certain color. They want to be turned upside-down for a different perspective. They want attention. They want to be left alone. You get the picture.

This is how the two primary canvases looked at the end of my last post.

First Canvas

FirstCanvas_TranslucentLayer

Second Canvas

SecondCanvas_TranslucentLayer

The Awkward Teenager Stage

Maybe this isn’t so much about the painting entering the awkward teenager stage as much as it is an extension of that stage. Certainly the last two pictures, which show each painting’s progress up to that point, look pretty awkward. And that is the great variable in this process. You can add as many layers, marks, and colors as you like. It all depends on when you feel like the painting is starting to come together and when the painting tells you that it is starting to come together.

Does that seem convoluted?

Anyways, after all those layers I applied in the first couple of weeks, I started to add imagery. The images can be abstract or real objects. They might stay in the final piece or they may completely change. It’s all up to intuition.

First Canvas Transformation

FirstCanvas_AddingImagesAs I sat in meditation one day, an idea popped into my head on what this canvas wanted to look like. I saw an image of an angel and a tree on either side of her. So I went with that idea.

Adding an Angel

Adding an Angel

I spent quite a bit of time dancing with this angel on the canvas. Then I flipped the canvas upside down and a face appeared. (Apologies for the poor picture quality. I only took one picture at this stage using the camera on my phone.)

Face appears

Face appears

Sigh. First, I was really excited about the angel. And then that face appeared. The more I painted, or tried to paint around the angel, the more I knew that the angel was constricting my progress on this piece. She took up too much room. I felt like I was trying to create around her instead of with her. I like angels. But this one was cramping my style.

After a lot of hesitation and avoidance, I had to say “Buh-buh” to my angel.

Buh-buh angel

Buh-buh angel

This was hard to do. I was quite attached to the angel. But part of the intuitive painting process asks us to let go of things we don’t need at that moment. It doesn’t mean that the image won’t appear again in the same painting. It simply means letting go for now. And that can open us up to new and greater things.

You’ll notice that I committed to the face that appeared. Seriously committed to it. That face will become a permanent part of this painting. Below are a two more images.

Second Canvas Transformation

Here is the second canvas with the initial group of shapes and images that I added.

SecondCanvas_AddingImages

For whatever reason, I wasn’t “feeling it” when I put these shapes on the canvas. This has been a fairly consistent occurrence that I became more and more aware of during class. Often, I would paint on one canvas and really feel like I was in the flow. I’d move to the next canvas and seem to lose that momentum. Maybe this was a sign that I needed to take a break in between each piece. Maybe the music playing at that moment wasn’t right. I haven’t figured that one out, yet.

I proceeded to flip the canvas and focused on the large flower shape.

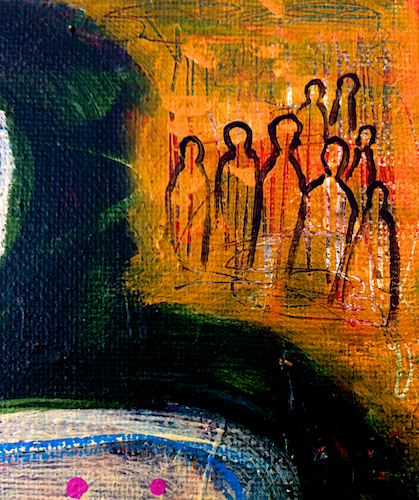
SecondCanvas_FlowerAppearsAt this point I’m trying very hard to practice non-attachment to the painting. And to keep my loud-mouth negative voice, named Ester, from squashing the whole thing. One aspect we did agree on was that we really liked the small spirits that gathered in the upper right corner of the canvas.

Spirits gathering

Spirits gathering

At this point, I walked away from the canvas. I really didn’t like it. Other than the spirits, I wasn’t liking anything about this piece. So I did something drastic. I obliterated everything except the gathering of spirits. I painted dark and moody. I had a blast doing it too.

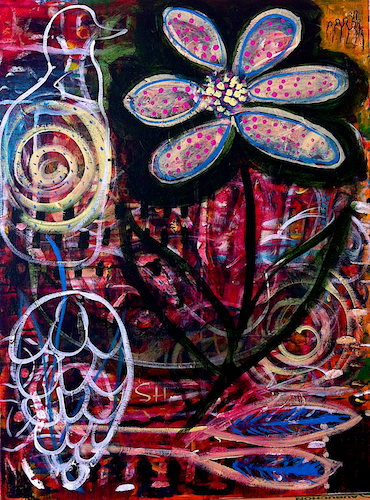
And then something magical happened. I looked around the studio. I decided to paint on the canvas the images of some art dolls hanging on my wall. This is when the winged creatures appeared.

Winged Creatures Appear

Winged Creatures Appear

Something clicked in this instant. Taking a giant leap had provided me with a new starting point. New potential. From here I began to add contrasting colors that made the winged creatures stand out. Now we were getting somewhere.

SecondCanvas_WingedCreatures_Color

Winged Creatures Detail

Winged Creatures Detail

And that is where I’m going to end this post. Both canvases have transformed through wild colors and many layers. Images are being added, then obliterated or reworked. Each piece is coming into its own. Moving out of the awkward teenager stage and into a blooming piece of art.


4 Comments

My First Two Weeks With Flora

As promised, I wanted to share with you my progress in Flora Bowley’s Bloom True online class. This class focuses on painting intuitively. That is, listening to your inner voice for direction, practicing non-attachment, getting rid of expectations, and playing. Lots of playing.

Believe me, it is not as easy as it sounds.

Listening to my inner voice isn’t hard. I’ve been doing that for a while now. Practicing non-attachment, not wondering what the final painting will look like, not letting the inner critic get too loud. Those things are much trickier to put into practice. Even playing with paint on the canvas can be a challenge at times.

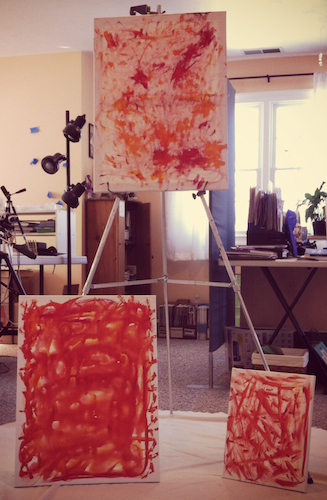
Our first couple of weeks have been spent getting to know our canvas, putting lots of layers on it, playing with the paint and textures and shapes. Here is my progress so far.

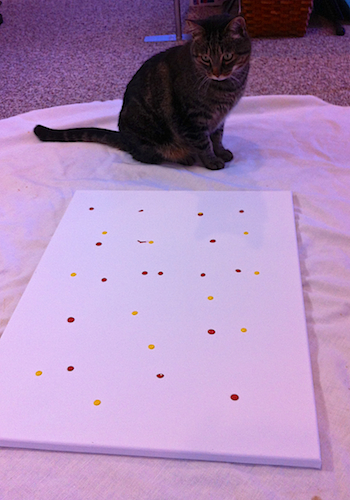
If you have a cat or dog at home, you know they want to help out in the studio.

"I wonder if Mom will let me help her paint?"

“I wonder if Mom will let me help her paint?”

We experiment with how to apply the first layer of paint. Wet on wet and then blindfolded. (Um, just me. Pippin did not participate. Really. Have you tried to blindfold a cat?)

Three Canvases Ready to Go

Three Canvases Ready to Go

After this approach, we work on adding layers. Warm layers, cool layers. Lots of layers. There is no right or wrong way to add layers of paint. Nor is there any magic number for how many layers to put on the canvas. It’s all about play and listening to your intuition.

First Canvas Progress

Here is the paint progression and transformation of the first canvas. (Click on the first image to start the slideshow.)

Second Canvas Progress

I work on at least two canvases at a time. While one canvas is drying, I can paint on another canvas and stay in the flow. (Click on the first image to start the slideshow.)

At this point, the paintings have gone through the “Wow, that’s cool” stage and the “Ew, that is really ugly” stage. Several times. Toward the end of last week I was getting better about practicing non-attachment and allowing myself to say “Wait until tomorrow” before passing too much judgement onto the piece.

Many times, seeing the painting with fresh eyes in the morning has been all it takes to appreciate the process.

I still have no idea where either painting is taking me or what they will look like in the end. And that’s okay.

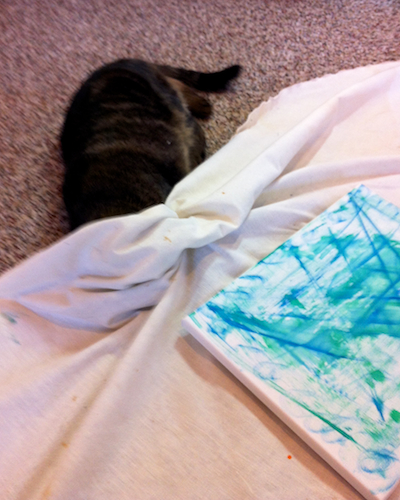
I’ll leave you with another cute cat picture. Pippin decided if he couldn’t help paint my canvas, he’d get creative with the drop cloth.

PippinGetsCreativeWithFloorTarp


2 Comments

Youth, Maiden, Mother, Crone

I don’t remember when I first heard the word “crone” in reference to older women. I do remember, however, thinking it was a horrible word. Just what an older woman wants to be called-a “crone.” Seemed to rank right up there with the words “spinster,” “hag,” and “old lady.”

Ironically, I find myself now facing that “crone” phase of life. It is a time of life that I am doing my best to embrace.

So where do the names come from? They seem to originate from Pagan or Wicca traditions. The Maiden is the young girl or woman who is full of enthusiasm, youthful ideas, and new beginnings. The Mother represents fertility, abundance, and growth. Finally, there is The Crone, the wise woman. Each phase represents a specific period in a woman’s life.

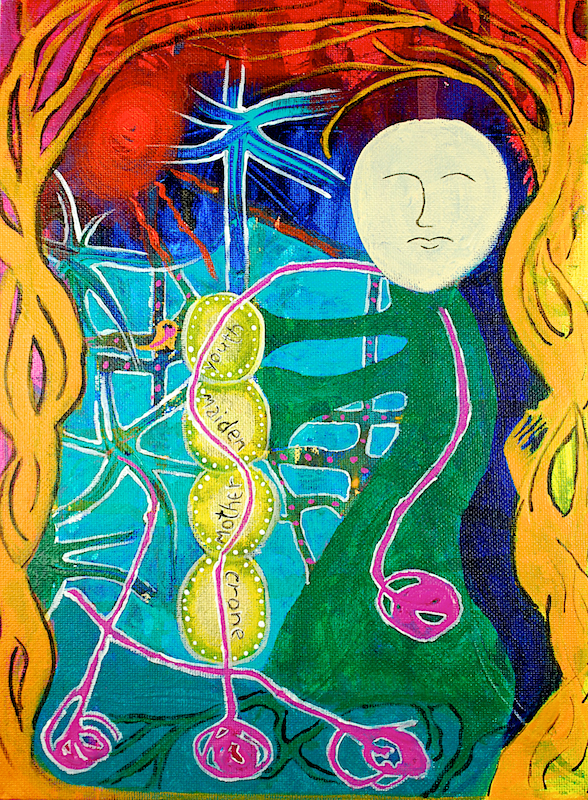
Prior to starting Flora Bowley’s Bloom True online class, I started painting on an 8″x11″ canvas. After I applied the initial layers of paint, my inner voice said to me “Crone. The name of this piece is Crone.”

Um, okay. I was simply calling it “Three Yellow Orbs.”

“And add a circle of cream colored paint right there” my inner voice said as I looked at the wet canvas.

Here is the canvas with the initial layers (when this conversation happened.) Do you see what my inner voice was telling me?

3YellowOrbs_8x10_Pt1

I’ve learned over time that listening to my inner voice, my intuition, is usually a good thing. The trick is not to react emotionally to that voice. I try my best to say “okay” or “hmm” first; to at least acknowledge it.

The next day I came back to the canvas and went to work. I let my intuition guide the process-choosing colors, writing words, adding paint and removing paint. The word “crone” stayed fixed in my mind, as did the words “youth,” “maiden,” and “mother.”

Finally, the painting was finished. I didn’t want to add any more lines or words or images. Here is what was appeared on the canvas.

Youth, Maiden, Mother, Crone (top third of painting)

Youth, Maiden, Mother, Crone (top third of painting)

Middle third of painting

Middle third of painting

Bottom third of painting

Bottom third of painting

Youth Maiden Mother Crone (Amy A. Crawley, 2014)

Youth Maiden Mother Crone
(Amy A. Crawley, 2014)

I really have no idea what some of the various marking and shapes mean. I’m not sure if it has to mean anything. It simply is.

If you’d like to read more about these phases of a woman’s life, check out The Three Stages of a Woman’s Life by Linda E. Savage.

______________________________________________________________________________________

I’m now into the second week of Flora’s online class. I’m learning a lot and having several a-ha moments. I’ll share my progress in my next blog post.


4 Comments

Imbolc and Feast of St. Brigid

Imbolc, also known as Candlemas, begins at sundown on February 1 and ends at sundown on February 2. It also runs concurrently with the feast of St. Brigid.

There is much to read about Imbolc and the feast of St. Brigid, so I won’t add more to that. Except to point you to one of my favorite descriptions about this holiday by Waverly Fitzgerald on her School of the Seasons website. And a post I wrote on Imbolc back in 2008.

I also came across this lovely song about St. Brigid by Celia, which prompted me to put together this post.

I listened to this song a couple of times and danced around the studio while it played. Moving the body is a great way to invite the creative muse to come and play. It also seemed appropriate because Brigid is also associated with creativity and creative ideas.

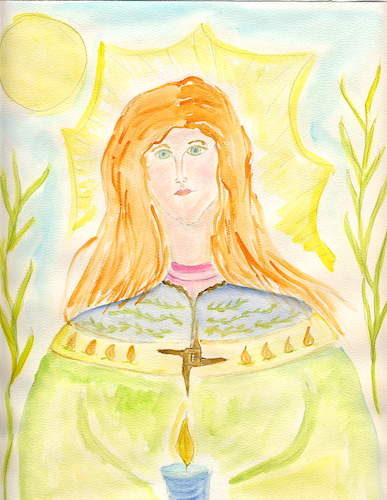
After dancing around the studio, I created this watercolor painting of St. Brigid in honor of her feast day.

St. Brigid Keeper of the Flame

St. Brigid
Keeper of the Flame

Working intuitively, this painting came together in less than 2 hours. I love when I can dive in and let the creative flow happen. Sketching comes easily. Choosing colors of paint is less stressful. The negative voice becomes quieter when it knows I’m not listening to it.

If you enjoyed Brigid’s song above and want to sing along, the version below includes the words.

Brigid so beautiful. Brigid so powerful.

Goddess Brigid, peace weaver, healer, poet, queen. Melt the snow and bring the spring.


8 Comments

Experiments in Intuitive Painting

A year ago, in February, I pulled some muscles in my back and spent several weeks recovering. I call that time period the “Universe tried to kick me in the a** and missed” month. During that February, I spent time learning about  St. Hildegard of Bingen. One of the practices I engaged in was creating mandalas or other forms of painting images inspired by daily readings and prompts.

It was during this time that I reawakened my love of painting and sketching. I also became more intrigued with using words or phrases as the catalyst for the pieces I created.

Fast forward several months. I’m pondering what direction my art wants to take me. Polymer clay is still my first love. But, realistically, sculpting is not agreeing with my hands. After a few hours, I can feel my thumb joints starting to ache. I am reminded of that time in February. I find an old email that contains a video interview with Chris Zydel of Creative Juices Arts. I remember being intrigued with the concept of intuitive painting the first time I heard about Chris and her work.

I start poking around the Internet for information on intuitive painting. Fortunately, I didn’t have to go too far down that rabbit hole before I found Flora Bowley’s website. I’m drawn in by what I see & read.

A few clicks later and I’ve ordered her book and some tempera paints to play with.

As my holiday show schedule came to a close, I set aside some time to read Flora’s book and play with my paints. I chose the tempera paints because they’re relatively inexpensive and figured it would be a good place to start playing with this form of painting. I also didn’t want to waste the few acrylic paints I did have on this experiment.

So I pulled out an unused watercolor pad, tore off a few pages, and began to play. Here are the first few intuitive paintings I created using those tempera paints.

Experiments with Tempera Paint

Intuitive Painting #1

Intuitive Painting #1

Intuitive Painting #2

Intuitive Painting #2

Angels in the Mist

Angels in the Mist

Flying Blue

Flying Blue

Tempera paints are, um, interesting. They dry pretty quick and don’t mix well unless you immediately put wet paint on top of wet paint. Granted the watercolor paper probably wasn’t the best substrate. But, you rock what you’ve got when you’re experimenting and playing with a new medium.

The Acrylics Arrive

A Christmas gift to myself was a sampler set of Liquitex soft body acrylics, plus a few other assorted colors, and a new assortment of paint brushes. Now I was ready to give this intuitive painting play some serious attention.

Here are two pieces in progress using the acrylic paints. Each is on a 5″x7″ canvas panel.

"Cellular"

“Cellular”

"Two Faces"

“Two Faces”

The acrylics are, for the most part, fun to use. The colors are more vibrant and tend to blend better than the temperas. I am having some interesting results when I spray water on the Liquitex paint. It often lifts right off the canvas, leaving behind either small water spots or larger blank spots. Sometimes the color layer underneath is retained. Sometimes it pulls right down to the white canvas.

I consider it a happy “accident” and try to work the effect into the overall painting. After all, I am trying to do this intuitively.

During this time I also signed up for Flora’s online course, BloomTrue

It was a slightly spontaneous decision. I had read about the course last fall. Then a couple friends recently told me about their experience taking the class. It started to feel like the Universe was putting it out there for me to make a choice. So I listened. Class starts February 10. I can’t wait to delve deeper into the process and share more paintings with you.


Leave a comment

My 2014 Word of the Year-Transform

Most years I choose a word to guide me through the year. Sometimes the word is a good choice. Sometimes not so much.  The process for choosing a word isn’t terribly scientific.  I’ve used Christine Kane’s approach to chose a word. I chosen from random words that pop in my head.

This year I was guided by a more spiritual-intuitive process from Christine Valters Paintner of Abbey of the Arts. This was a 12-day mini-retreat which included daily emails that provided a daily practice to help you contemplate potential words. What was different with this process, for me, is that it wasn’t about ME CHOOSING a word. Rather, it was about a word CHOOSING ME.

There is a difference.

When we choose a word, we’re looking and striving for THE word. We want it to be perfect. We obsess. Our little noggins say “this is the word that I want.”

When we allow time for a word to choose us, we, hopefully, let go of ego and let our intuition guide the process. We must let go of expectations (the perfect word) and listen to what stirs internally. Words that excite. Words that make us uncomfortable. Words that call us to grow.

So, for 12 days, I paid attention to words & phrases that appeared frequently in readings. I wrote down words that resonated with me. Words that made me uncomfortable. I made note of synchronicities.

At first, I thought my word would be “possibilities” or “possible” as in “With you all things are possible.” After surviving several losses over the past 18 months, I was feeling that in 2014 anything is possible, both good and not so good.

Then I paid more attention to other words that appeared and resonated with me. And the one word that appeared over and over was transform.

Transform means to change markedly the form or appearance of; to change the nature, function or condition of. It comes from the Old French “transformer” and Latin “transformare.” The prefix trans means “across.” So trans-form would be taking the normal mode of behavior “across” into a whole new form.

The word is quite fitting. During that 18 month period with one loss after the other, I started to question many things, from the meaning of life to the meaning of my work. I turned inward and gradually began working on my spiritual development. I thought more about what really makes me happy in life.

Now that we have started a new year, it truly is a time of new beginnings. It may sound cliche but I think of the caterpillar who cocoons and turns into a butterfly. Much work is being done internally in that cocoon. And when the butterfly emerges a wonderful transformation has occurred.

I feel I am gradually emerging from my cocoon. I have made changes in my business plan for 2014, such as not doing any art shows and closing my ArtFire Online Studio account. I’m looking forward to spending more time on personal & spiritual development. And I’m gradually starting to paint again.

So here is to 2014. A year to transform. A year of transformation.

Hanging Around in Sedona

Hanging Around in Sedona


3 Comments

“Trees Through The Forest”-Part 2, The Progress Continues

Though I had all good intentions of posting more frequent updates on the progress of my new wall art, I just wasn’t feeling it. My goal is to write one post a week that is published on Wednesdays. But, to be honest, when I don’t have anything to say, I stay quiet. To paraphrase that old saying “if you don’t have anything new/interesting/inspiring to say…”

In my absence here, I’ve been busy planning a new teaching gig, writing the content for a free tutorial, and videotaping another tutorial. Writing the free tutorial is a whole new experience. Develop the idea, write out the process, take pictures of the steps, edit the pictures, write the process in Keynote (that is what I’ll use to convert the tute into a PDF), proof read, publish. I’ve set a date of August 15 as my deadline and have been working backwards from there to manage the various steps in the process.

Makes my brain ache some days.

BUT! In between all that I have made progress on “Trees Through The Forest.” You can read about the origins of this piece and see its beginnings here.

Part 2: Progress Continues

After I created the disk shapes and added texture to them, I baked them in the oven for 15 minutes. Then I had to decide what paint colors to use as a patina. This helps make the texture marks pop on the clay. For some unknown reason this felt like an agonizing process. Is this what they mean by “suffering” for your art?  No, I didn’t think so.

After the patina process was completed, I used liquid polymer clay to secure any piece that had multiple disks or other components. I let all the pieces sit for several hours while the liquid clay set up. Then everything went back in the oven for one more baking.

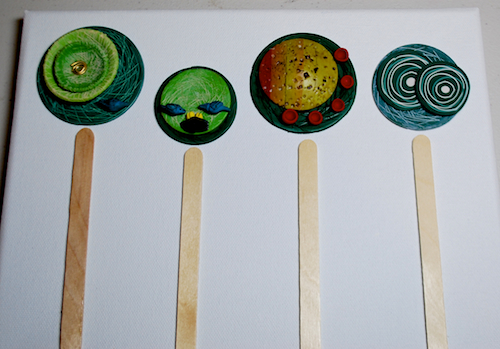
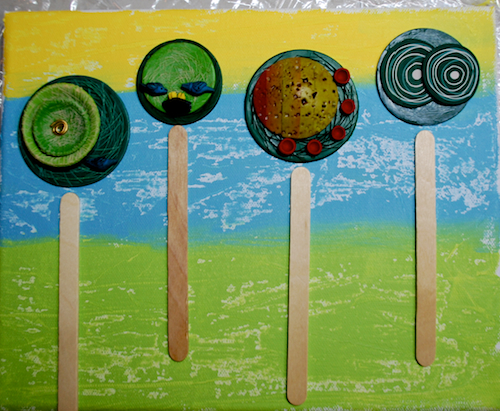
Here are the polymer clay disks placed on a blank canvas. The popsicle sticks mark where the tree trunks will eventually be painted.

3TreesThruForest_Polymer Disks

And some detail shots of the disks. (Click on the image to enlarge.)

Now the fun begins with creating the background for this piece. I decided to use a 10″x8″ canvas.

Preparing and Painting the Canvas

First, I applied two coats of Gesso to smooth the surface of the canvas.

10Ready to Gesso the Canvas

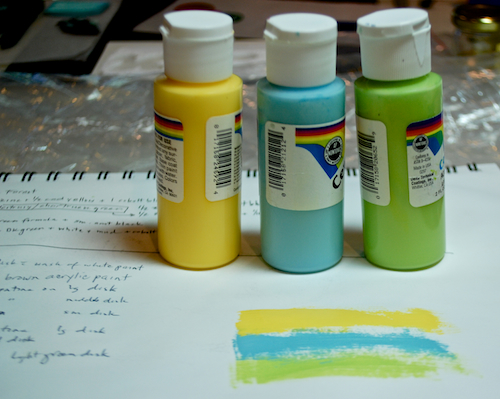
While that dried, I picked out the colors for the background. Here I tested them out in my sketchbook so I know they’ll look nice together.

11Color choices for the canvas

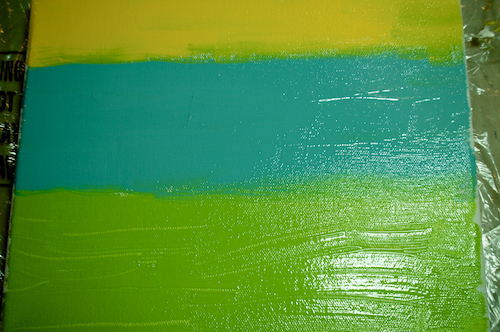
Once the Gesso completely dried, I held my breath and applied the paint colors. I’m working intuitively here but still felt a little nervous.

12The painted canvas

Before even painting the colors onto the canvas, I looked at several surface techniques in the book Surface Treatment Workshop by Darlene Olivia McElroy and Sandra Duran Wilson.

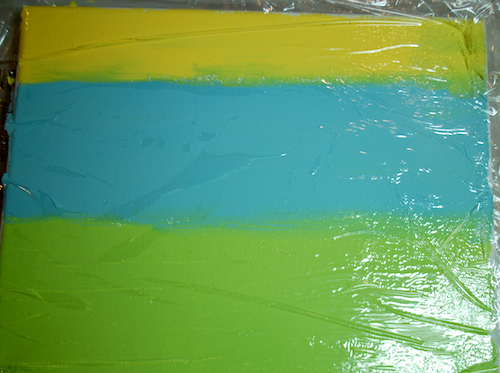
I decided upon the plastic wrap resist technique. With this technique, you place a sheet of plastic wrap over the wet paint. You can stretch the plastic into linear patterns or pat it smooth.

Plastic wrap over canvas

Plastic wrap over canvas

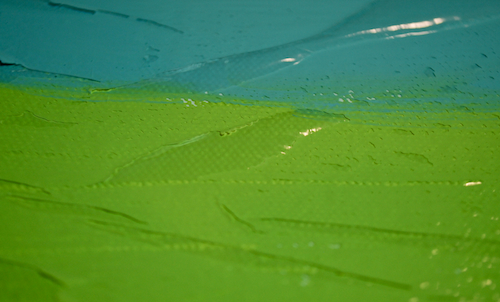
Plastic wrap over canvas-detail

Plastic wrap over canvas-detail

See all those lines and bumps? The trick with this technique is to let the paint dry before removing the plastic wrap. The drier the paint, the crisper the texture.

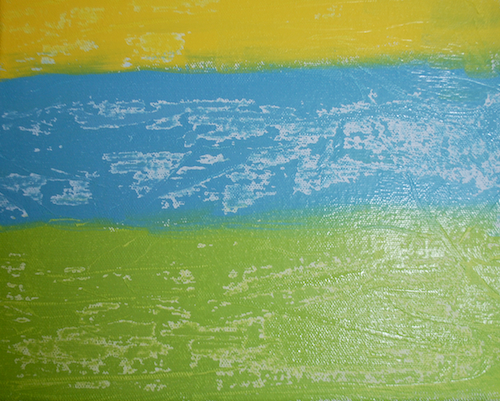
And now the big reveal…..

Paint texture

Paint texture

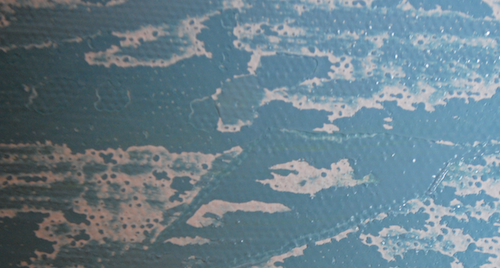
And a detail shot of the texture:

16Paint texture detail

I was pleasantly surprised with how nice the texture came out.

I’ll leave you with this piece, “Trees Through the Forest,” almost finished.

Almost finished

Almost finished

The edges of the canvas have been painted. Since I took the above picture I removed the popsicle sticks and painted in tree trunks. I’m not sure if I need to add anything else to the canvas, so I’ll let things sit for a day or so. If the muse tells me the piece is done, I’ll put a hanger on the back and attach the polymer disks to the canvas.

I’m going to install this piece on Monday, August 5 so there isn’t much more time to agonize think about it. I’m meeting my deadline which was most important.


Leave a comment

A Year of Mindfulness: Appreciate Your Hands

So how did you do last week with eliminating filler words? I thought it would be easy. However, eliminating those words is more of a challenge than I expected.

As an artist I spend a lot of time by myself. When I’m with family or friends, conversation is a welcome change of pace. What I realized this past week was how quickly I forgot this mindfulness practice. It wasn’t until late in the week when visiting a friend that I listened to myself while speaking. My big filler word? “Um.”

I find I use the word “um” as a way to string together my thoughts. Instead of taking a short, silent pause between phrases or sentences, I fill the silence with “um.”

Of course, the more aware of this I became, the more effort I put into trying to stop myself from saying “um.” I was hearing myself speak, then thinking “stop saying um,” and then worked harder to try and stop myself. Frankly, it was a bit exhausting. The solution? Speak slower and think about what you’re saying.

This week’s practice

This week’s mindfulness practice is to appreciate your hands. Several times during the day this week, observe your hands as you use them in activities. Observe them at rest. Observe your hands as if they belonged to someone else.

We use our hands naturally and unconsciously. This week observe your hands, how you use them, and how they help you.

Caution: I suggest doing this practice during safe activities. Watching your hands while driving, chopping veggies, or cutting wood is not recommended.

Reflection: If you ever need a helping hand, you’ll find one at the end of your arm.  -Yiddish proverb


Leave a comment

Monday Reflection: Begin The Journey

It may be that when we no longer know what to do,
we have come to our real work,
and when we no longer know which way to go,
we have begun our real journey.

~Wendell Berry